


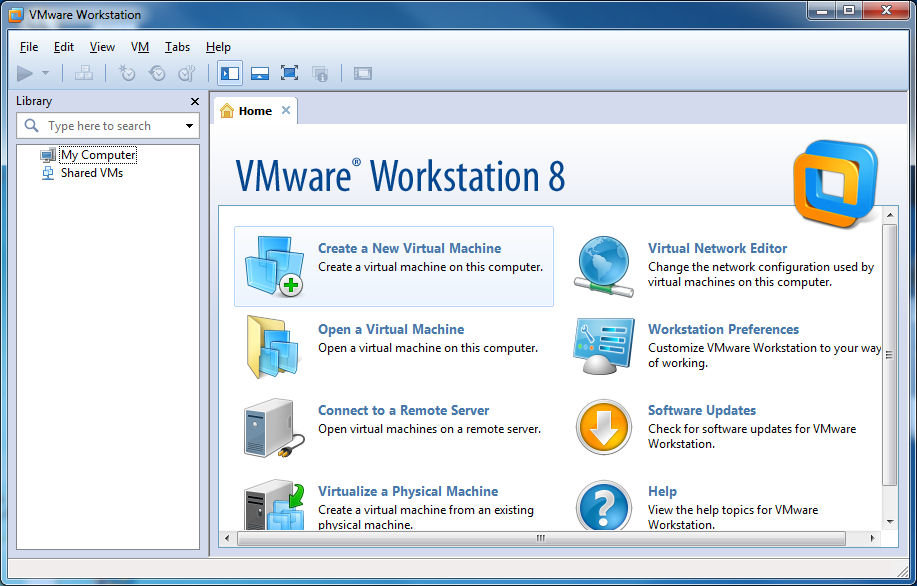
Step 1 - Get VMware Workstation
To get VMware Workstation, you must first request a Product Key from VMware.
Follow this link to get the key for the trial: https://www.vmware.com/...
Creating a new VMware account is a little bit annoying, as they ask quite a lot of personal questions, but what you "really" need here is a valid e-mail address - your honesty for the rest of it is not really our concern. After registering, you will get an e-mail to the account you specified with information on retrieving a key. You will need this key during the installation of VMware Workstation 8. You can also download the VMware Workstation 8 installer from the VMware site.
Step 2 - Get Windows 8 Developer Preview ISO
Microsoft is offering direct downloads of THREE separate ISOs.
Pick one from here: http://msdn.microsoft.com/...
Please NOTE the minimum system requirements of each, and then realize that you will need to go beyond the memory requirements on the machine you install VMWare Workstation on. For this example, we will be installing the x86 developer preview, in VMware Workstation, on a notebook with an Intel Core 2 Duo CPU T5500 @ 1.67GHz and 2GB of RAM. If you want to try an x64 installation, you will obviously need more memory than that.
TIP: You can use a download accelerator program for the ISO images, since they are simply direct downloads. JDownloader is highly recommended for that (read a guide for that here.) Downloading directly in your browser will surely take longer.
Step 3 - Create New Virtual Machine
Run VMware Workstation 8. Click "Create a New Virtual Machine", and a new window will pop up (below).

What type of configuration for your VM? - Choose "Typical" here.
Click Next.
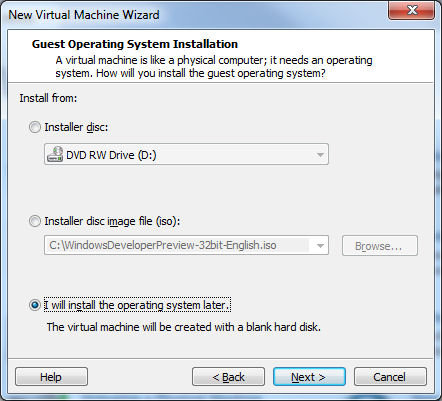
Guest Operating System Installation. - Here you are expected to provide a source for your Operating System installation, so this would be either a CD/DVD or ISO image. If you had a Windows 7 DVD, for example, VMWare would recognise the version and would make the process even easier than it already is to complete.
VMware does not recognise the developer preview of Windows 8 yet, however. To avoid possible problems with Setup, here we are going to choose the third option; "I will install the Operating System later."
Click Next.
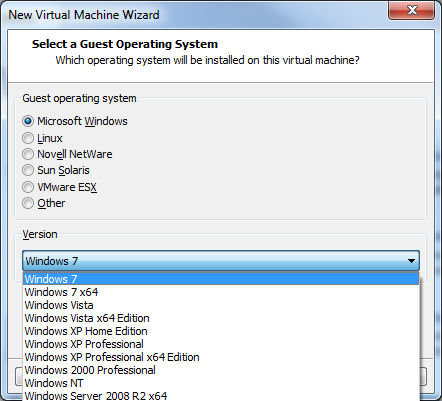
Select a Guest Operating System. - To automate certain things, VMware asks you to select which Guest Operating System you want to Install. Select "Microsoft Windows", and for the Version, select "Windows 7" if installing the x86 / 32-bit version of the Windows 8 Developer Preview, or "Windows 7 x64" if installing the x64 / 64-bit version of the Windows 8 Developer Preview.
Click Next.

Name the Virtual Machine / Provide Location. - You can name your Virtual Machine anything you want, since the name only matters to VMware anyway (it's not the same as naming your OS installation later on). As for the Location, this can be any folder on any disk where you can provide at least 20GB space, if needed (see next step for more info).
If you have more than one physical drive connected to your computer (directly, not USB), it might be a good idea to store your Virtual Machine files in a dictory on a different physical disk than your Host operating system is installed. In our case, we can't, so we just opt for "C:Win8". You can use any blank Director (folder) you choose.
Click Next.
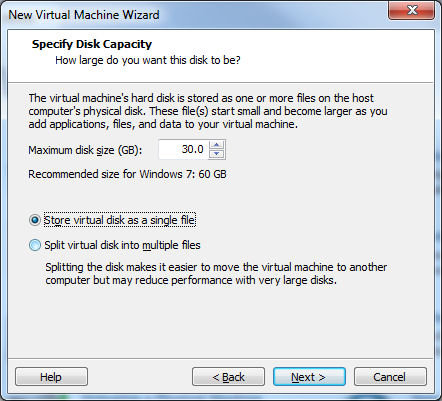
Specify Disk Capacity. - VMware will suggest 60GB for Windows 7. You do not need that much just to test out the Developer copy of Windows 8. We choose 30GB, but 20GB will be just fine.
NOTE: This does not mean 20GB hard disk space will be used up immediately. This is the maximum amount of storage space the Guest OS is allowed to use on your hard drive. Even though you might set it to 20GB, only around 6-7GB will actually be used up upon installation. What you specify here is just the maximum space it can utilize.
We also suggest that you opt to "Store Virtual Disk as a Single File," for performance reasons.
Click Next.
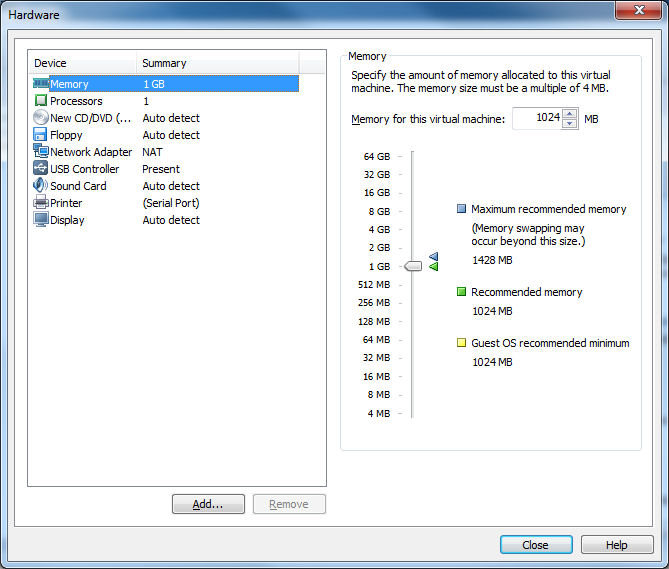
Hardware - Memory. - The next thing you need to do is specify some hardware settings for your Virtual Machine. For memory, you will need to set at least 1GB (1024MB) for the x86 installation, or 2GB (2048MB) for the x64 installation.
Now click Processors.
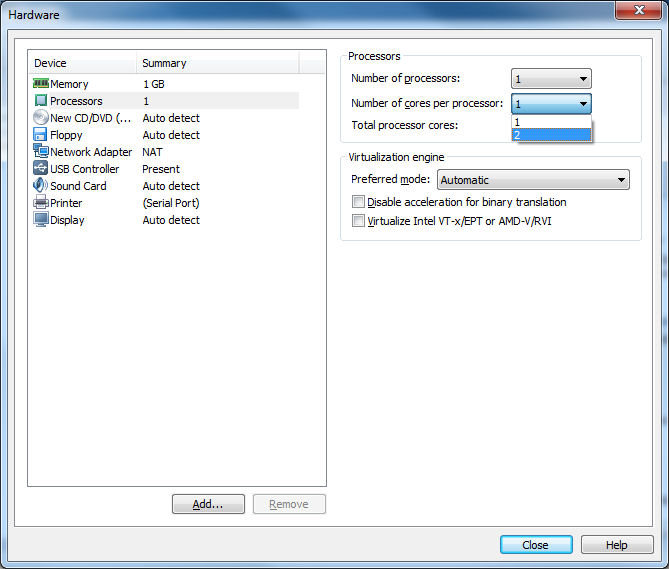
Hardware - Processors. - If you have a single-core processor, you can leave the number of processors at 1, and number of cores at 1. If you have a dual-core processor, as we do on the test system, then set "Number of cores per processor," to 2.
Now click CD/DVD.
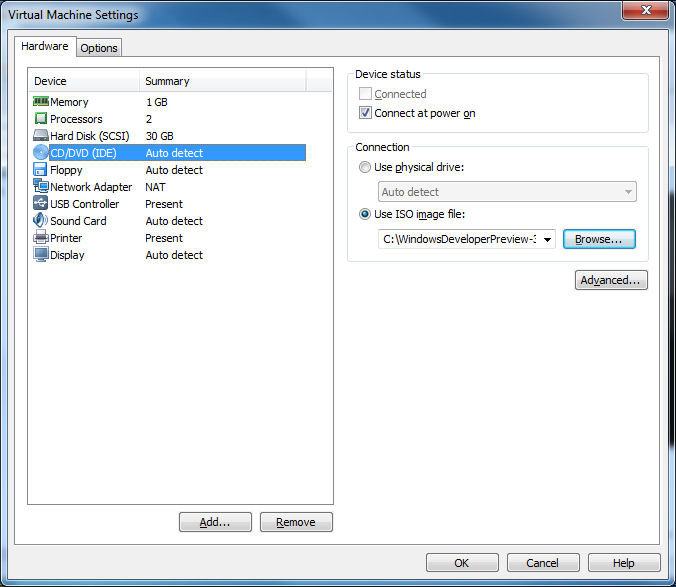
Hardware - CD/DVD/ISO. - If we were to boot your Virtual Machine now, it would have nothing to do, it would just stop at "Operating System Not Found," so we need to specify some media to boot from.
Under Connection, select "Use ISO image file". Click Browse, and navigate to the directory where you saved the ISO image containing the Windows 8 Developer Preview installation. Double click the ISO file when you find it to select it.
Now when you power on your Virtual Machine, that ISO image will be mounted to a virtual CD/DVD drive, and once the VM finds nothing on the virtual hard drive, it will proceed to boot from the virtual CD/DVD drive instead.
Click Close.
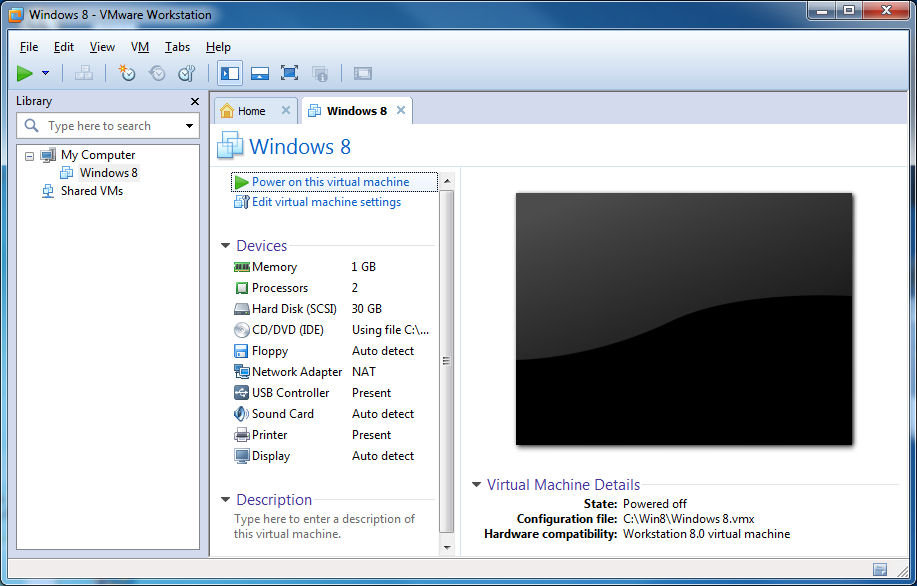
Power on your Virtual Machine. - You will now see your Virtual Machine, powered Off, in VMware Workstation. Click "Power on this Virtual Machine" and wait for the installation to commence.
Some things to remember...
- Double click inside Virtual Machine, tap CTRL + ALT + ENTER to go Full Screen mode.
- CTRL + G allows you to input data directly to VM.
- CTRL + ALT + ENTER also exits full screen.
- To unlock your Keyboard / Mouse from VM, hold CTRL + ALT outside of Full Screen.
Step 4 - Windows Setup
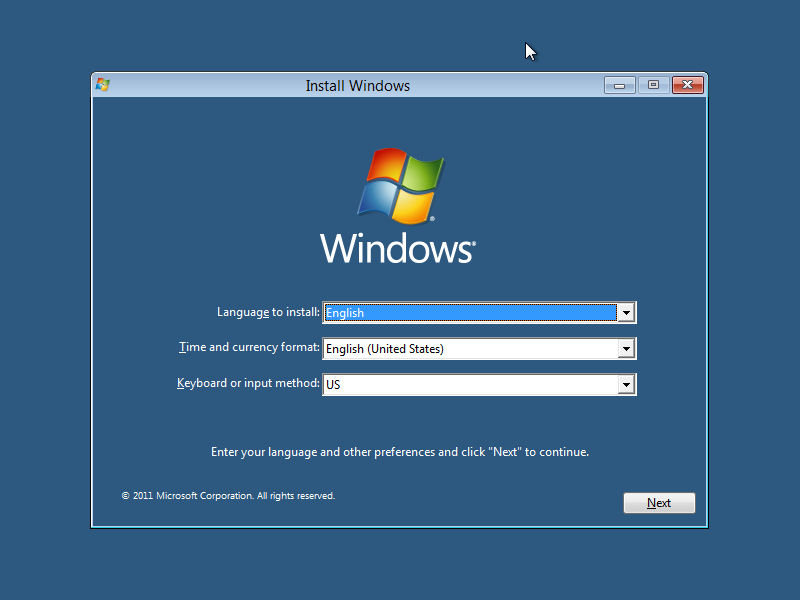
Install Windows. - Select your Language, Time and Currency Format and Keyboard or input method.
After you make your selection, click Next, then click "Install Now", when the option appears. You will get a License information screen, accept the License Agreement and click Next.
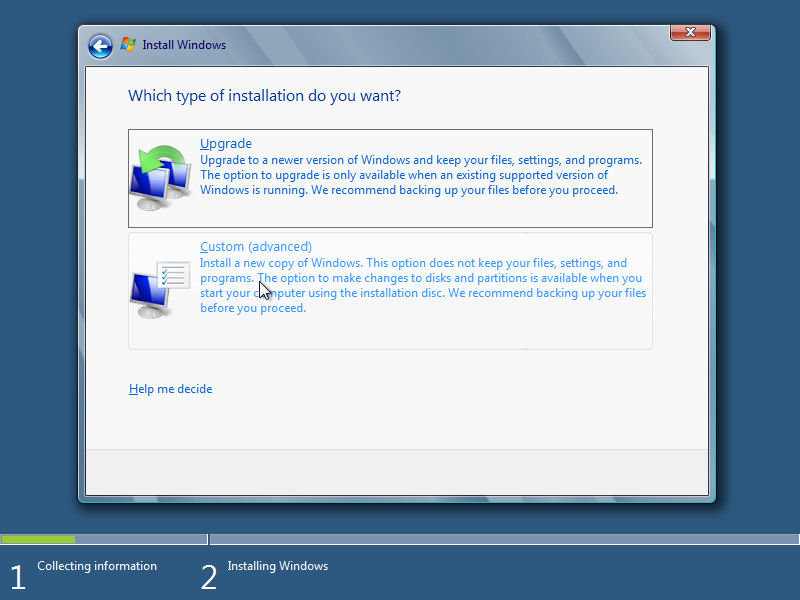
What type of installation do you want?. - Since your VMware is acting like a fresh OS-less PC, click the Custom option, which will install a new copy of Windows.
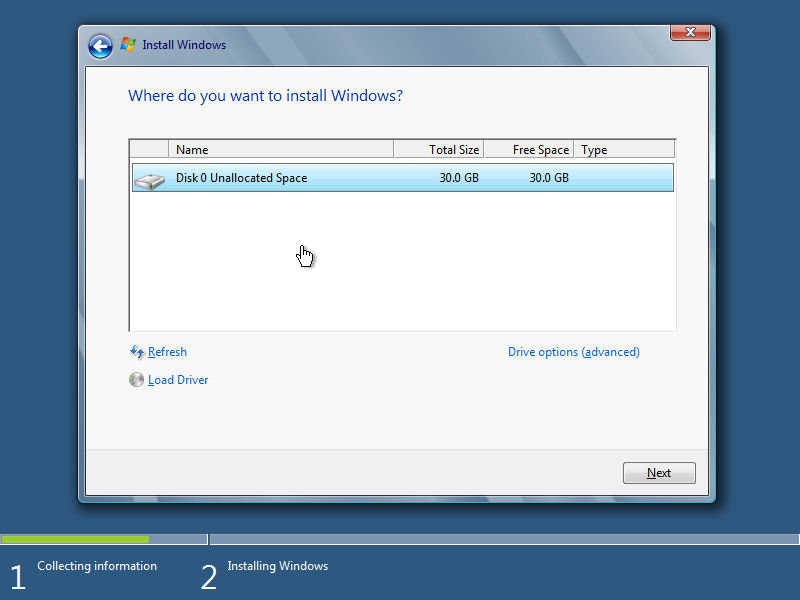
Where do you want to Install Windows?. - Well obviously there is only one option, so select that.
Click Next.
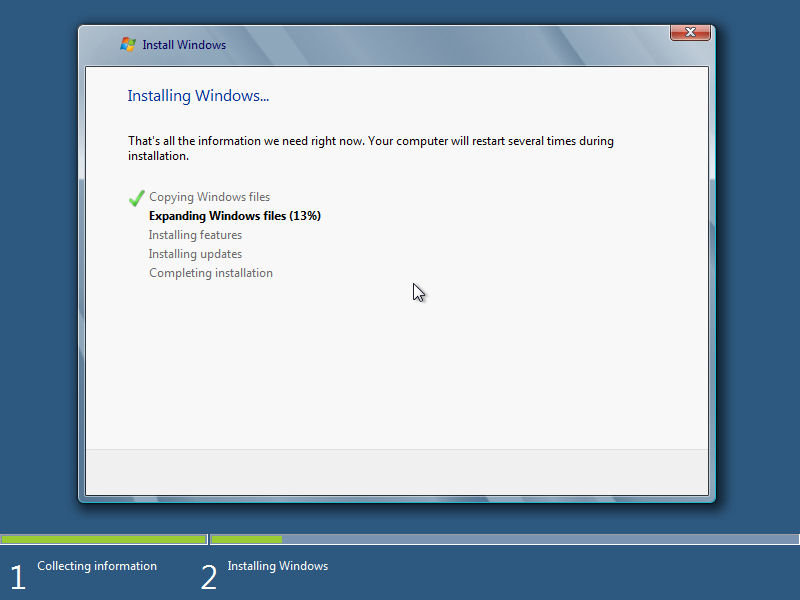
Windows Installation Process. - The Windows Installation Process does not ask you for anything else before proceeding to setup an account and change some settings. This is actually a pretty fast installation, taking just over 10 minutes for us to complete.
Still, the amount of time you will be waiting depends on your own hardware and the resources available to VMware. The Virtual Machine will reboot several times, and will appear to be doing nothing at least once. Just wait.
Step 5 - Personalize User Account, Settings

Name Your PC. - The first thing you need to do is name your PC. You cannot use special characters or spacing. Also, remember that your PC cannot have the same name as your user account.
When done, click Next.
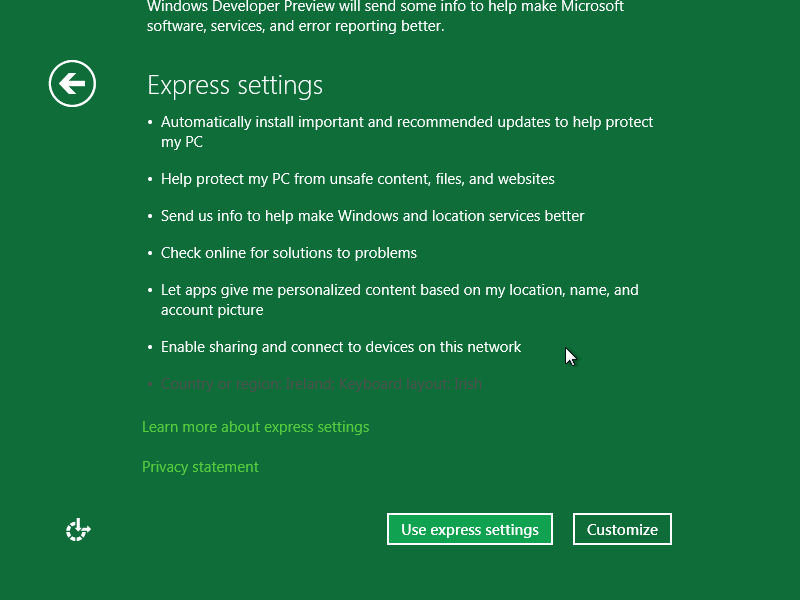
Use Express Settings?. - Express Settings are typical security settings, network settings etc. You can take the extra step of clicking Customize to turn any off that you want. Some users, for example, won't want to send information to make "Windows and location services better."
Either click Express Settings now, or Customize.

Use Windows Live Address?. - There are two ways to use an account in Windows 8, one is through using your Windows Live Account (much like Xbox Live), or if you would prefer not to, then you can create a local account. Either enter an email address here for Windows Live services or click, "Don't want to login on Windows Live ID?".
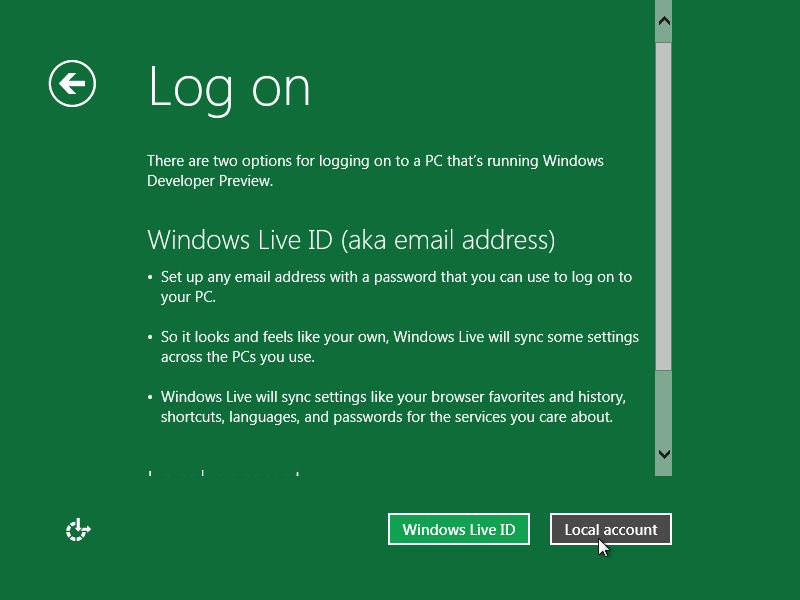
Create a Local Account. - You will be given the chance again here to create a Windows Live account (which you can always do later) or opt to Create a Local Account.
Click "Local Account".
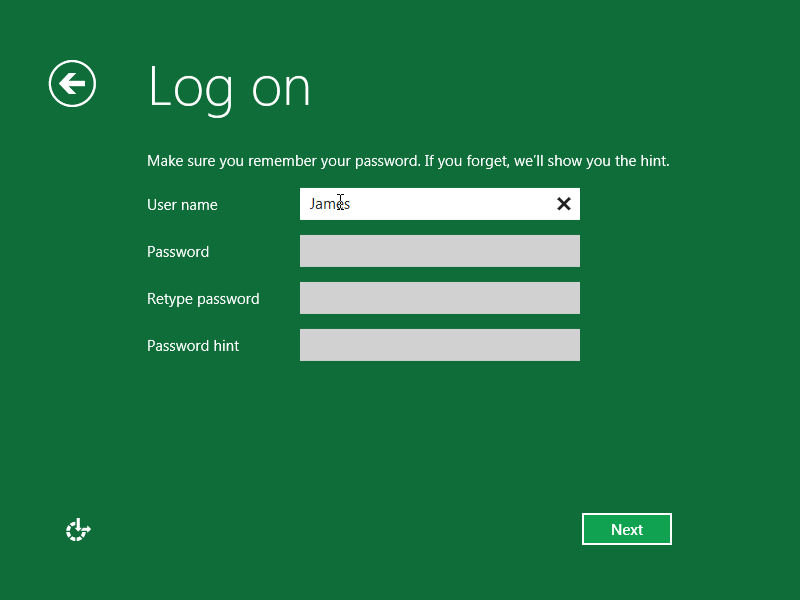
Local Account Details. - Here you will have the chance to pick a User Name, set a Password and a Password Reminder.
When you have done that click Next.
Now Windows will go into a cycle of Finalizing settings for you (might reboot). After this is done, it will automatically log you in.
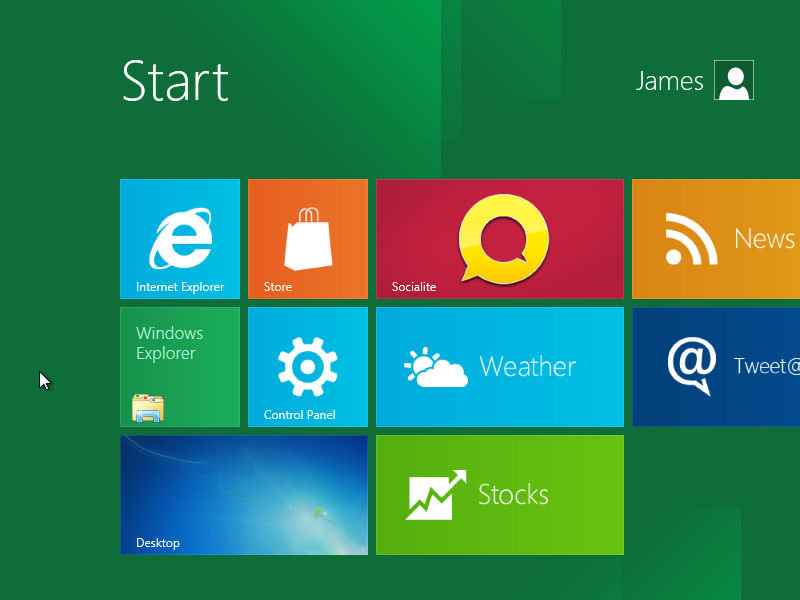
First Metro UI Appearance. - If you are now at the Metro UI, congratulations, everything has gone fine so far. You can now click the button below the Window indicating that you have finished the Installation (yellow bar below the Virtual Machine window in VMware).
You will notice however that your sound is (probably) not working, your screen resolution is (probably) very low and your (probably) aspect ratio is probably wrong. So to make this look "good" and work properly, it is vital to install the VMware Tools.
To do this, we need to get out of Metro UI and back to the traditional Desktop. Click the "Desktop" tile in the Metro UI and it will load a Windows 7-like Desktop.
Step 6 - Install VMware Tools
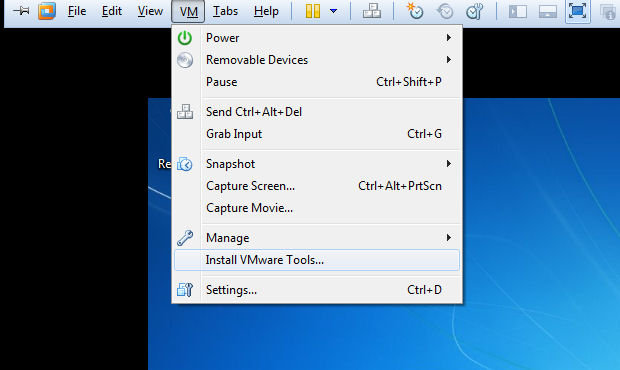
VMware Tools Installation. - Now that you are on the Windows 8 Development Preview Desktop, we need to install the VMware tools. To do this, move your cursor to the top of the screen and to the VM menu.
Click VM and then click Install VMware Tools. You will get a pop-up window, so just confirm you want to install the tools and continue.
Run the VMware tools Setup. - To insall the VMware Tools, VMware will emulate an installation CD within your Guest operating system. Windows 8 will NOT load the setup automatically, and chances are you will miss the notification that a disc has been inserted completely.
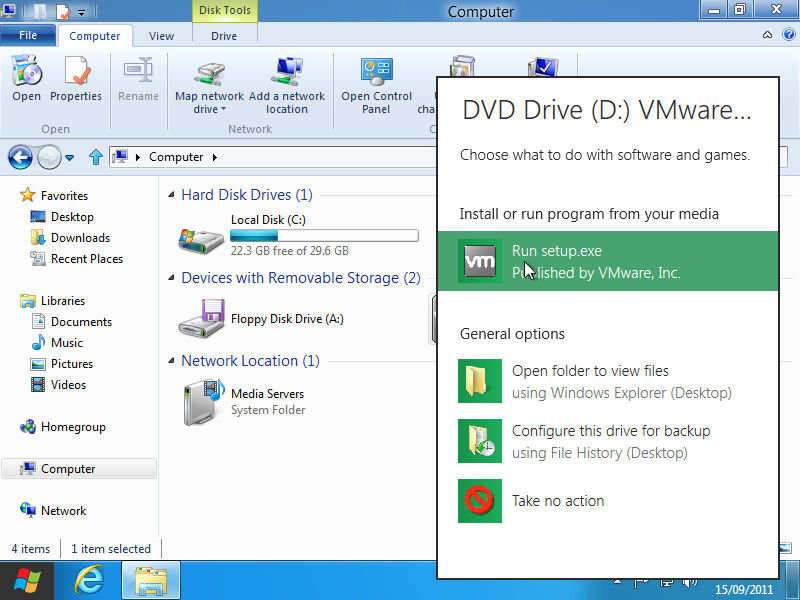
Therefore, you need to manually run the Setup program. To do that, open Windows Explorer in the traditional Desktop (click the Folder on the Taskbar).
In the Address Bar, type Computer and hit Enter. You will now see the information on the drives connected to your Virtual Computer. The CD/DVD drive will be shown as VMware disc.
Right click it, and click "Play Autorun". and then from the options that appear, click Run Setup.
You will get a UAC prompt that you need to accept, and after that the Setup should load (you might need to minimize Explorer to see it.)
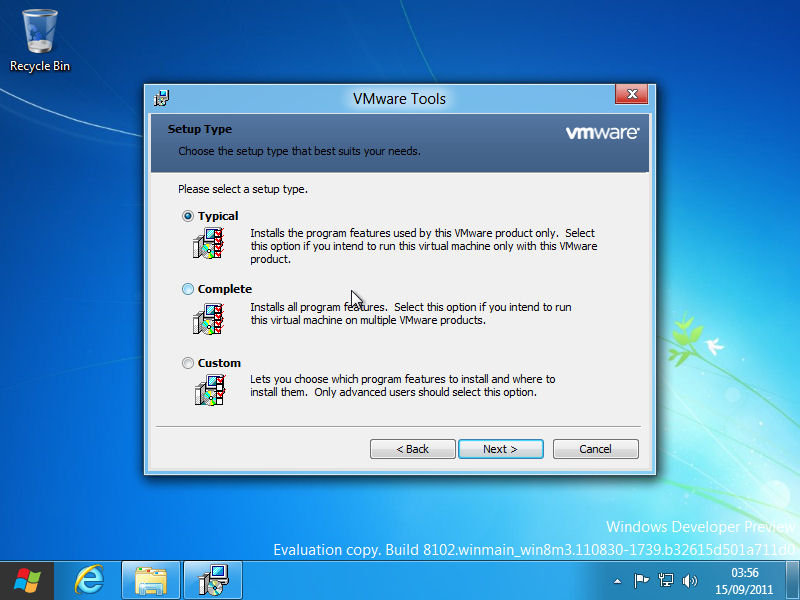
Typical Installation. - Choose to Install the VMware tools in the installer that appears. You will be asked to sepcify a Typical, Complete or Custom installation. All you will need to select here is Typical (you can always re-install / remove tools later if need be).
Select "Typical" and click Next.
The VMware Tools installation will take a few minutes. Your screen will probably go black several times as the Video driver is being installed. Once it has completed, you will need to restart your system as prompted.

Success? - The boot right after the VMware installation might take some extra time to complete, but just hang in there. If all went well, you should now see the Metro UI appear in a higher resolution.
That's it. You now have the Windows 8 Developer Preview installed in VMware Workstation, so have fun.